Binder planning basics · Reviewed 2 September 2026
How to plan a Pokémon card binder
A good binder plan answers three questions before the cards move: how many pockets you really need, what order the cards should follow and where future additions can go.
1. Decide what the binder is for
A set binder, a Pokédex, a favourite-Pokémon collection and a trade binder all need different rules. The setup wizard now labels the finished binder as either a Collection Binder or Trade Binder, while both purposes can use a custom layout or a published Vault X® range. Write down the binder rule in one sentence. For example: “one English copy of every numbered card in the set, followed by promos” or “every Pikachu artwork in release order”.
If the collection is open-ended, plan breathing room. A fixed set can use nearly every pocket, but a character or artist collection should have deliberate empty pockets or an easy place to continue.
2. Count cards and physical pockets
Do not rely only on a binder’s marketing name. Calculate pockets across × pockets down × usable sides. A 3 × 3 page holds nine cards per side. A bound binder with 20 double-sided sheets usually offers 40 card sides and 360 pockets.
Then count the actual pieces of cardboard in your intended checklist. Reverse holos, promos and alternate printings are additional cards even when they share a collector number.
Useful rule: if the checklist is still changing, leave at least one spare page or choose the next capacity up. Moving ten cards is easy; moving three hundred because one promo appeared is not.
3. Choose an order you can explain
Collector number is the simplest set order, but it is not the only sensible one. You might place a reverse holo beside each standard card, group every reverse at the end, follow National Pokédex order, or reserve facing pages for a favourite evolution line.
Whatever you choose, apply it consistently. If another collector can understand the rule after looking at two pages, the binder will be easier to maintain.
4. Simulate the pages first
Create the matching pocket grid in the planner, then auto-fill a set or drag cards individually. Page through the virtual binder and look specifically at page turns. The card at the end of one page and the start of the next often reveals an awkward split that a flat checklist hides.
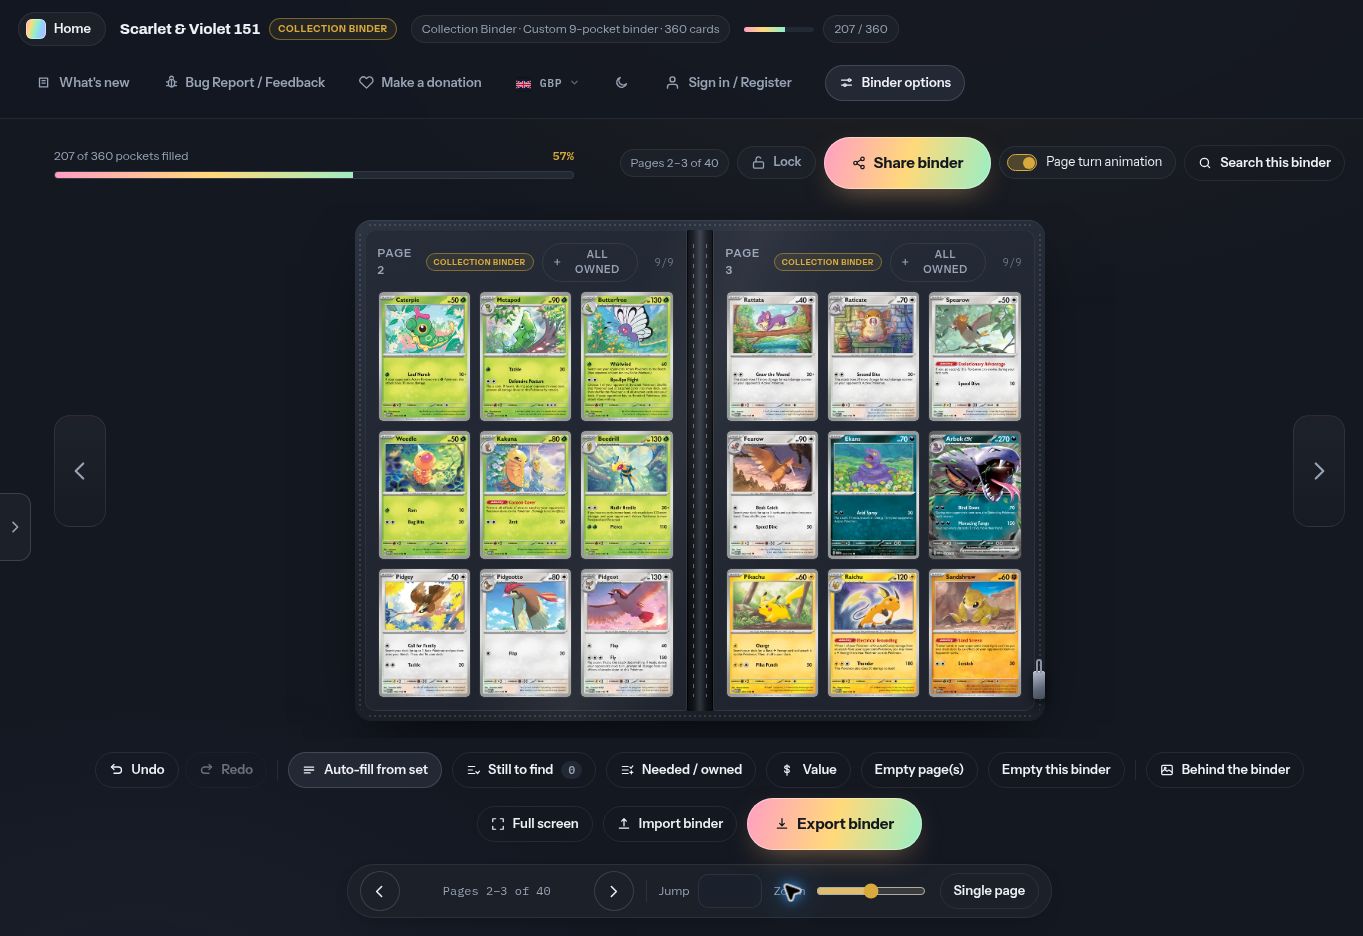
You can mark missing cards as needed, search the placed cards by name or number, move a selected group to free pockets in another saved binder and test artwork inserts without disturbing the physical collection.
5. Keep a restorable copy
Without an account, the planner saves binders only in the current browser on the current device. A free account can keep the same binders backed up and available to update on your phone, tablet and computer. In either case, export JSON after a meaningful planning session because JSON can be imported back into the site. PDF is useful as a visual reference, while CSV or Excel is better for sorting and checking a list.
A shared link is a read-only snapshot and does not update when the original binder changes. Create a new link when you want to share a later version. Finally, take a quick photograph of the physical binder after arranging it. The virtual and physical records solve different problems, and together make rebuilding far easier.